3 Code Splitting Patterns For VueJS and Webpack
Anthony Gore | July 8th, 2017 | 4 min read
Code splitting a single page app is a great way to improve its initial loading speed. Since a user doesn't have to download all the code in one hit, they'll be able to see and interact with the page sooner. This will improve UX, especially on mobile, and it's a win for SEO, as Google penalises slow loading sites.
Last week I wrote about how to code split a Vue.js app with Webpack. Long story short, anything you wrap in a single file component can easily be code split, as Webpack can create a split point when it imports a module, and Vue is happy to load a component asynchronously.
I believe the hardest part of code splitting is not getting it to work, but knowing where and when to do it. I'd go as far as to say that code splitting needs to be an architectural consideration when designing your app.
In this article I'll present three patterns for code splitting a Vue.js single page app:
- By page
- By page fold
- By condition
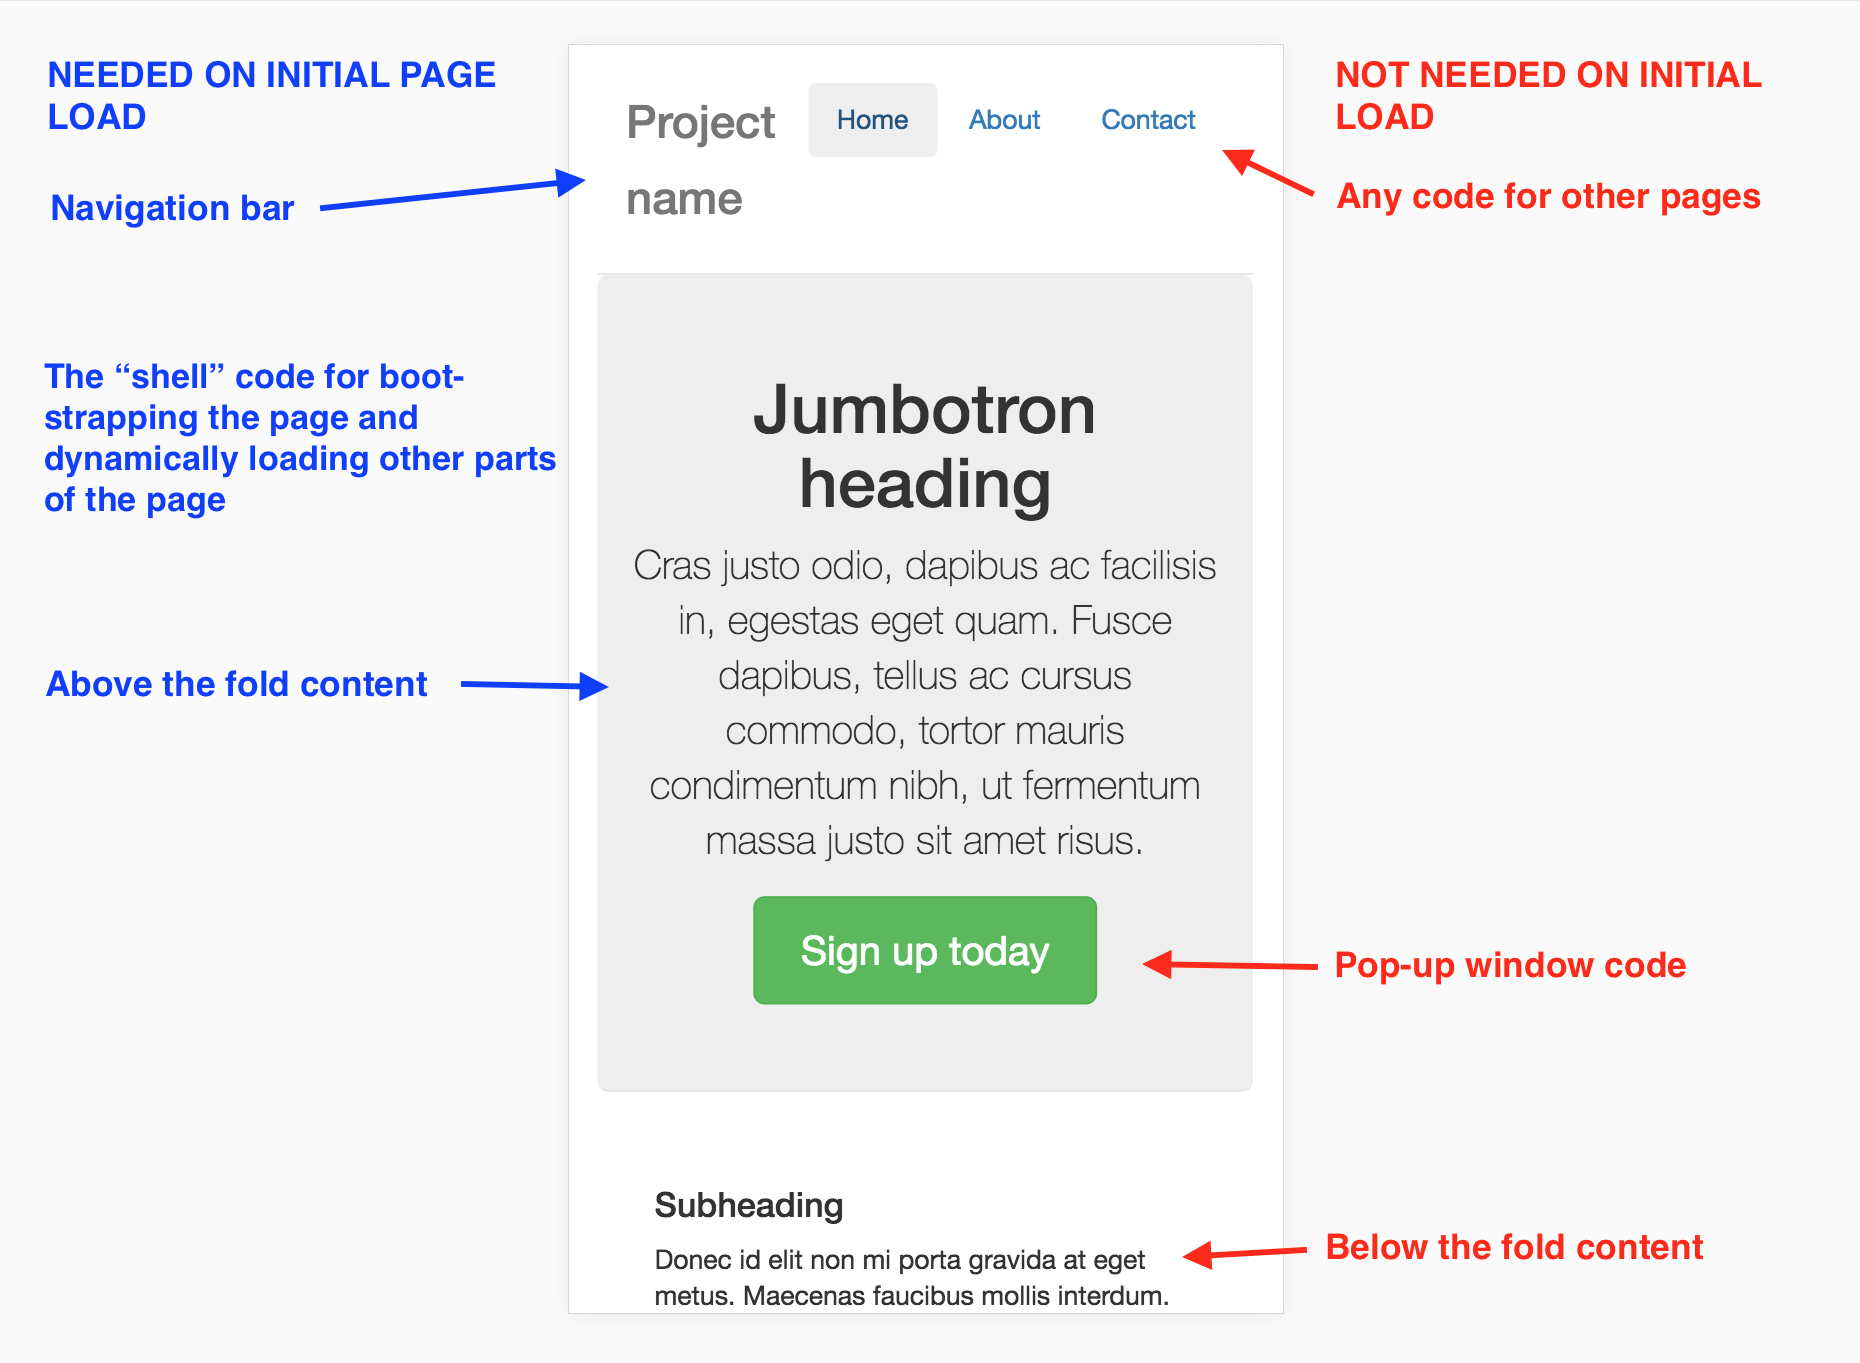
1. By Page
Splitting your code by page is an obvious place to start. Take this simple app, which has three pages:
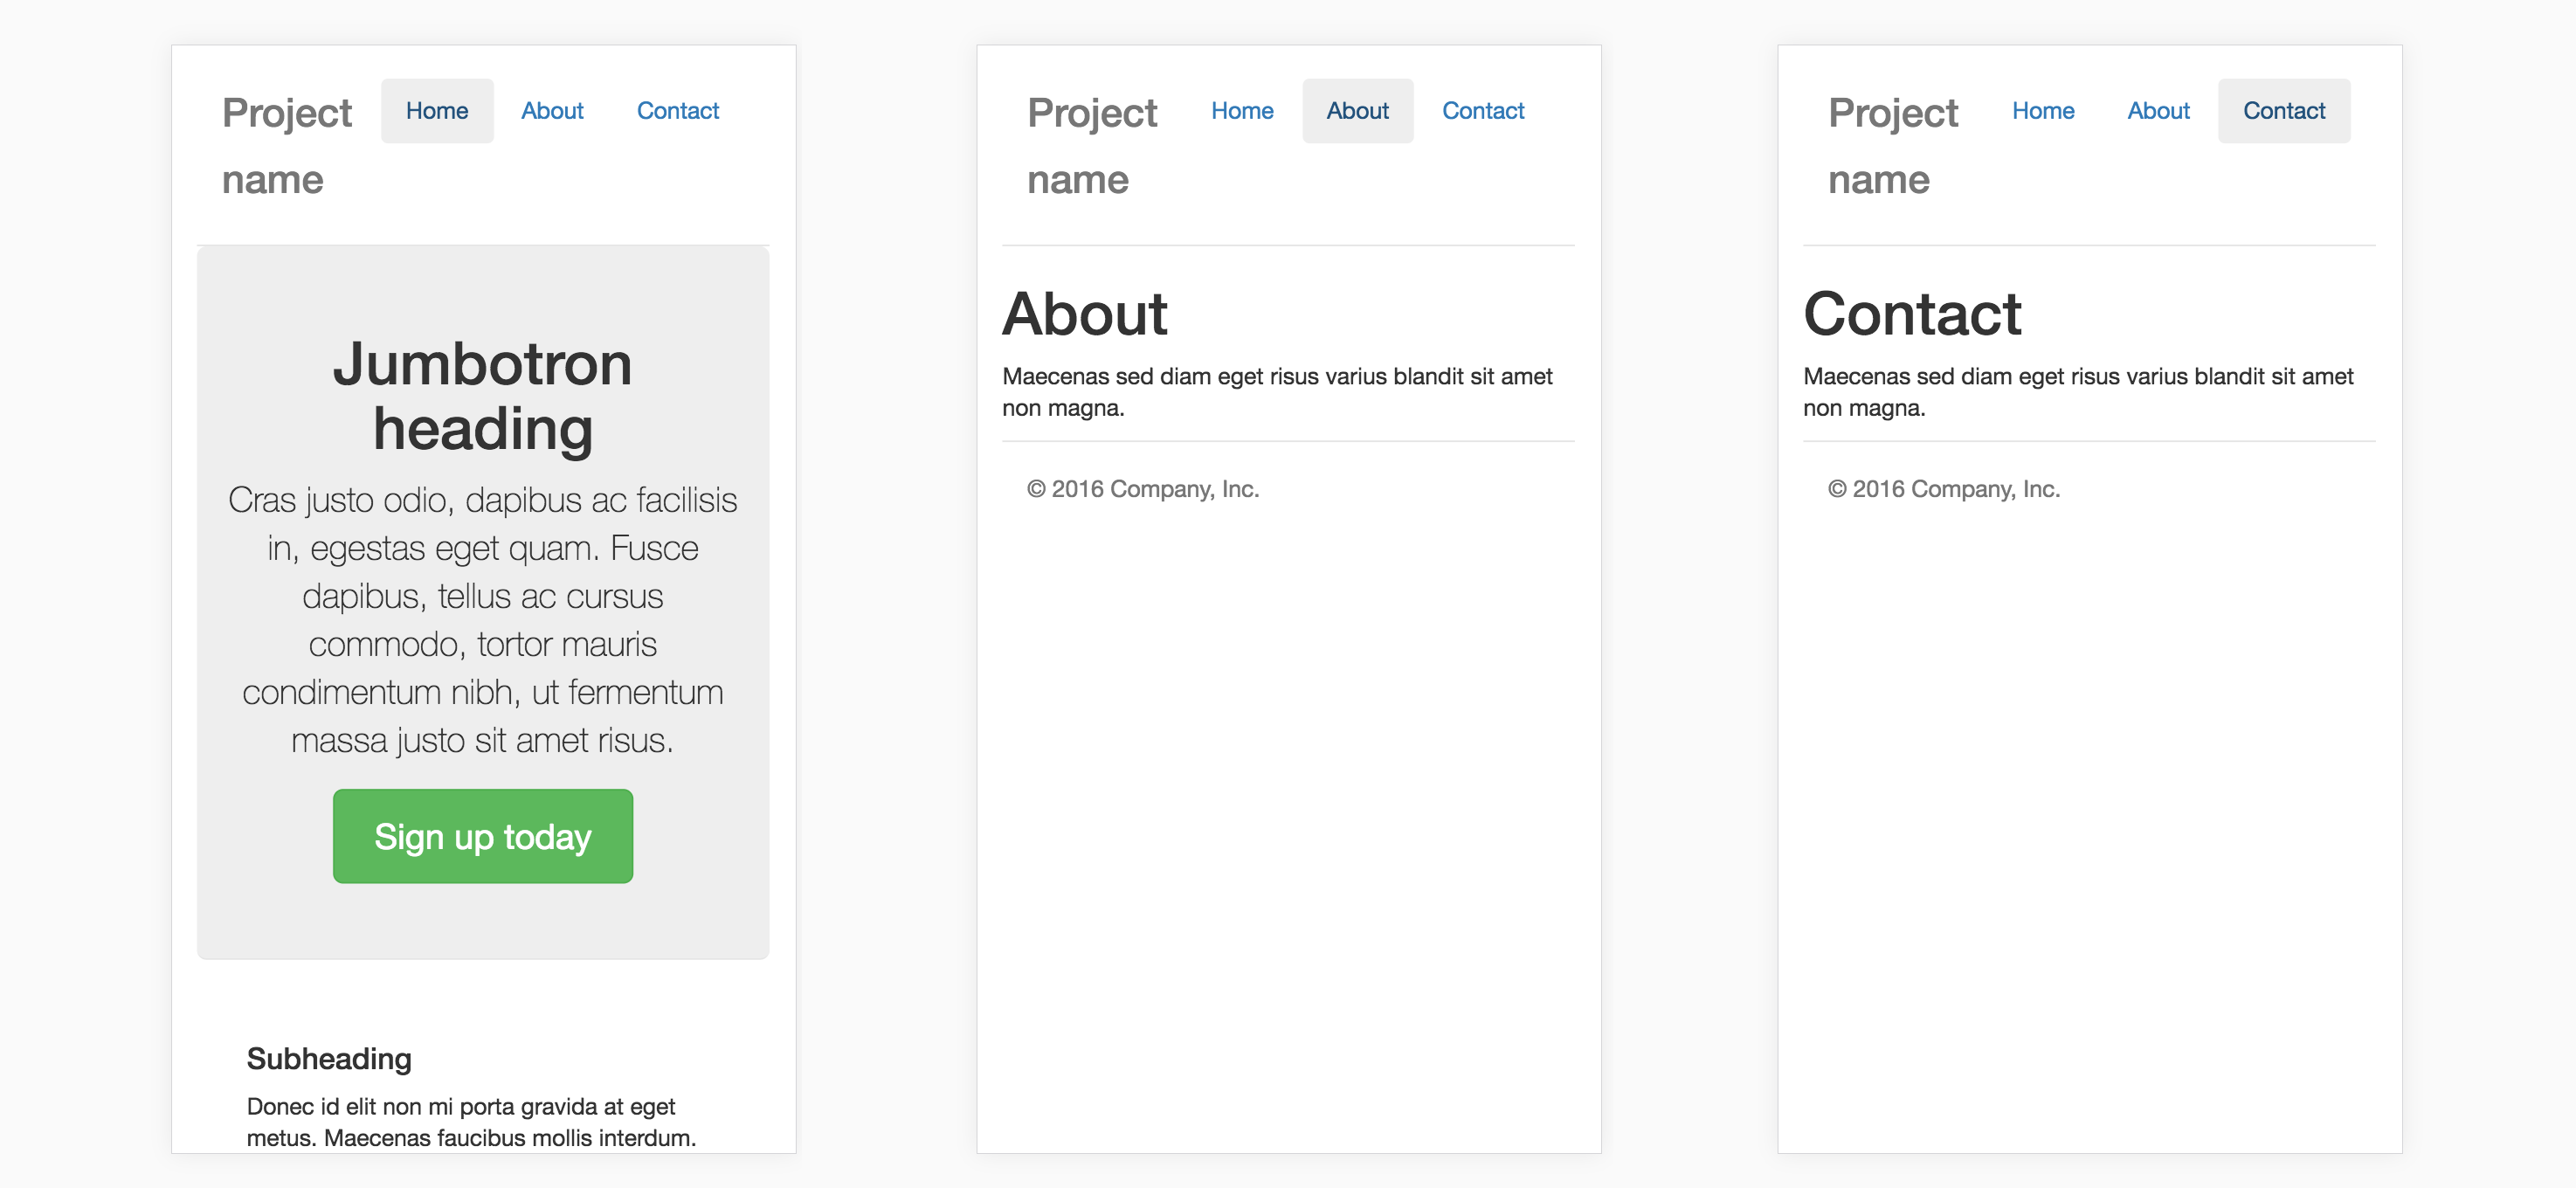
If we make sure each page is represented by its own single file component e.g. Home.vue, About.vue and Contact.vue, then we can use Webpack's dynamic import function to split each into a separate build file. Then, when the user visits a different page, Webpack will asynchronously load the requested page's file.
This is trivial to implement if you're using vue-router, as your pages will already need to be in separate components.
routes.js
const Home = () => import(/* webpackChunkName: "home" */ './Home.vue');
const About = () => import(/* webpackChunkName: "about" */ './About.vue');
const Contact = () => import(/* webpackChunkName: "contact" */ './Contact.vue');

const routes = [
  { path: '/', name: 'home', component: Home },
  { path: '/about', name: 'about', component: About },
  { path: '/contact', name: 'contact', component: Contact }
];
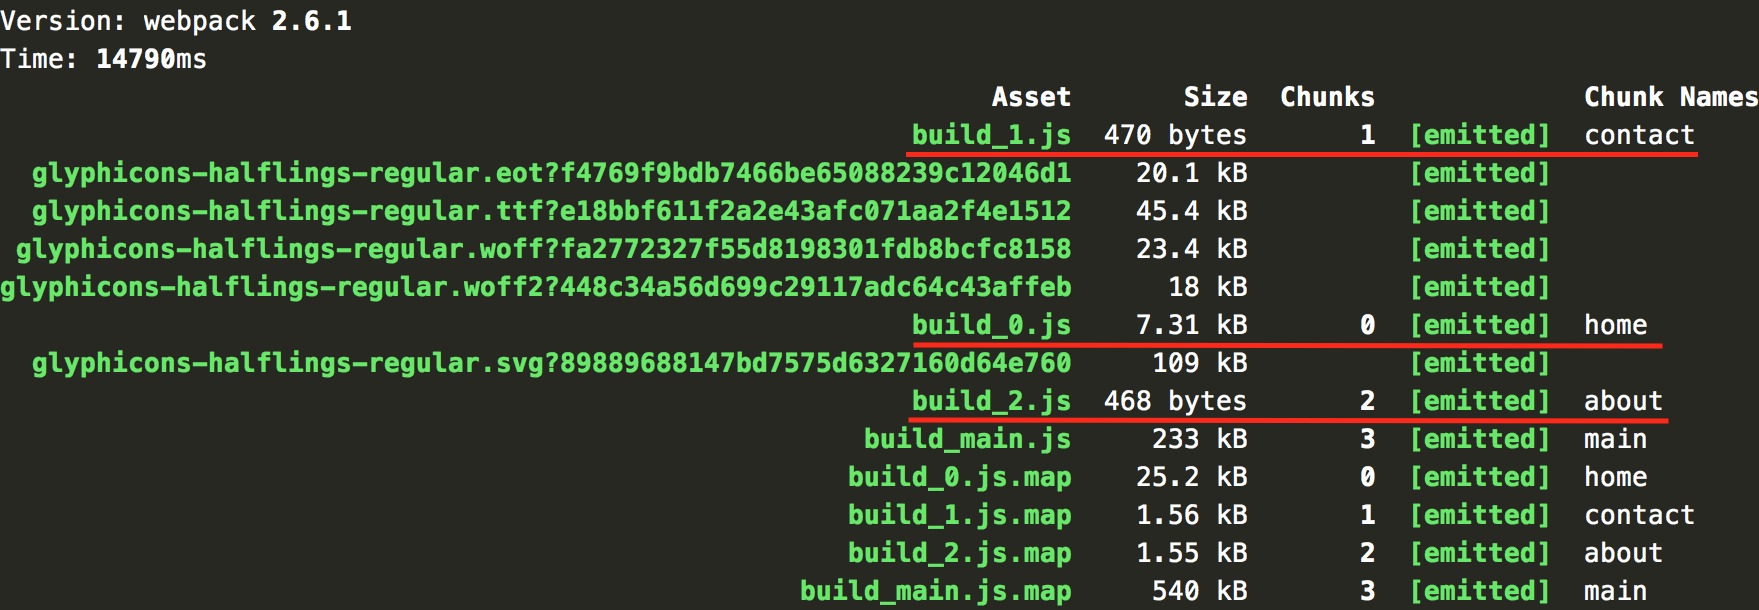
Take a look at stats generated when we build this code. Each page is in its own file, but also note there's a main bundle file called build_main.js, which contains any common code as well as the logic for asynchronously loading the other files. It will need to be loaded no matter what route the user visits.
Now let's say I load the Contact page from the URL http://localhost:8080/#/contact. When I check the Network tab I see the following files have loaded:

Notice that the initiator of build_main.js is (index). This means that index.html requested the script, which is what we'd expect. But the initiator of build_1.js is bootstrap_a877.... This is the Webpack script that is responsible for asynchronously loading files. This script is added to the build automatically when you use Webpack's dynamic import function. The important point is that build_1.js did not block the initial page load.
2. Below The Fold
Below the "fold" is any part of the page that is not visible in the viewport when the page initially loads. You can asynchronously load this content since the user will usually take a second or two to read above the fold before they scroll down, especially on the first time they visit the site.
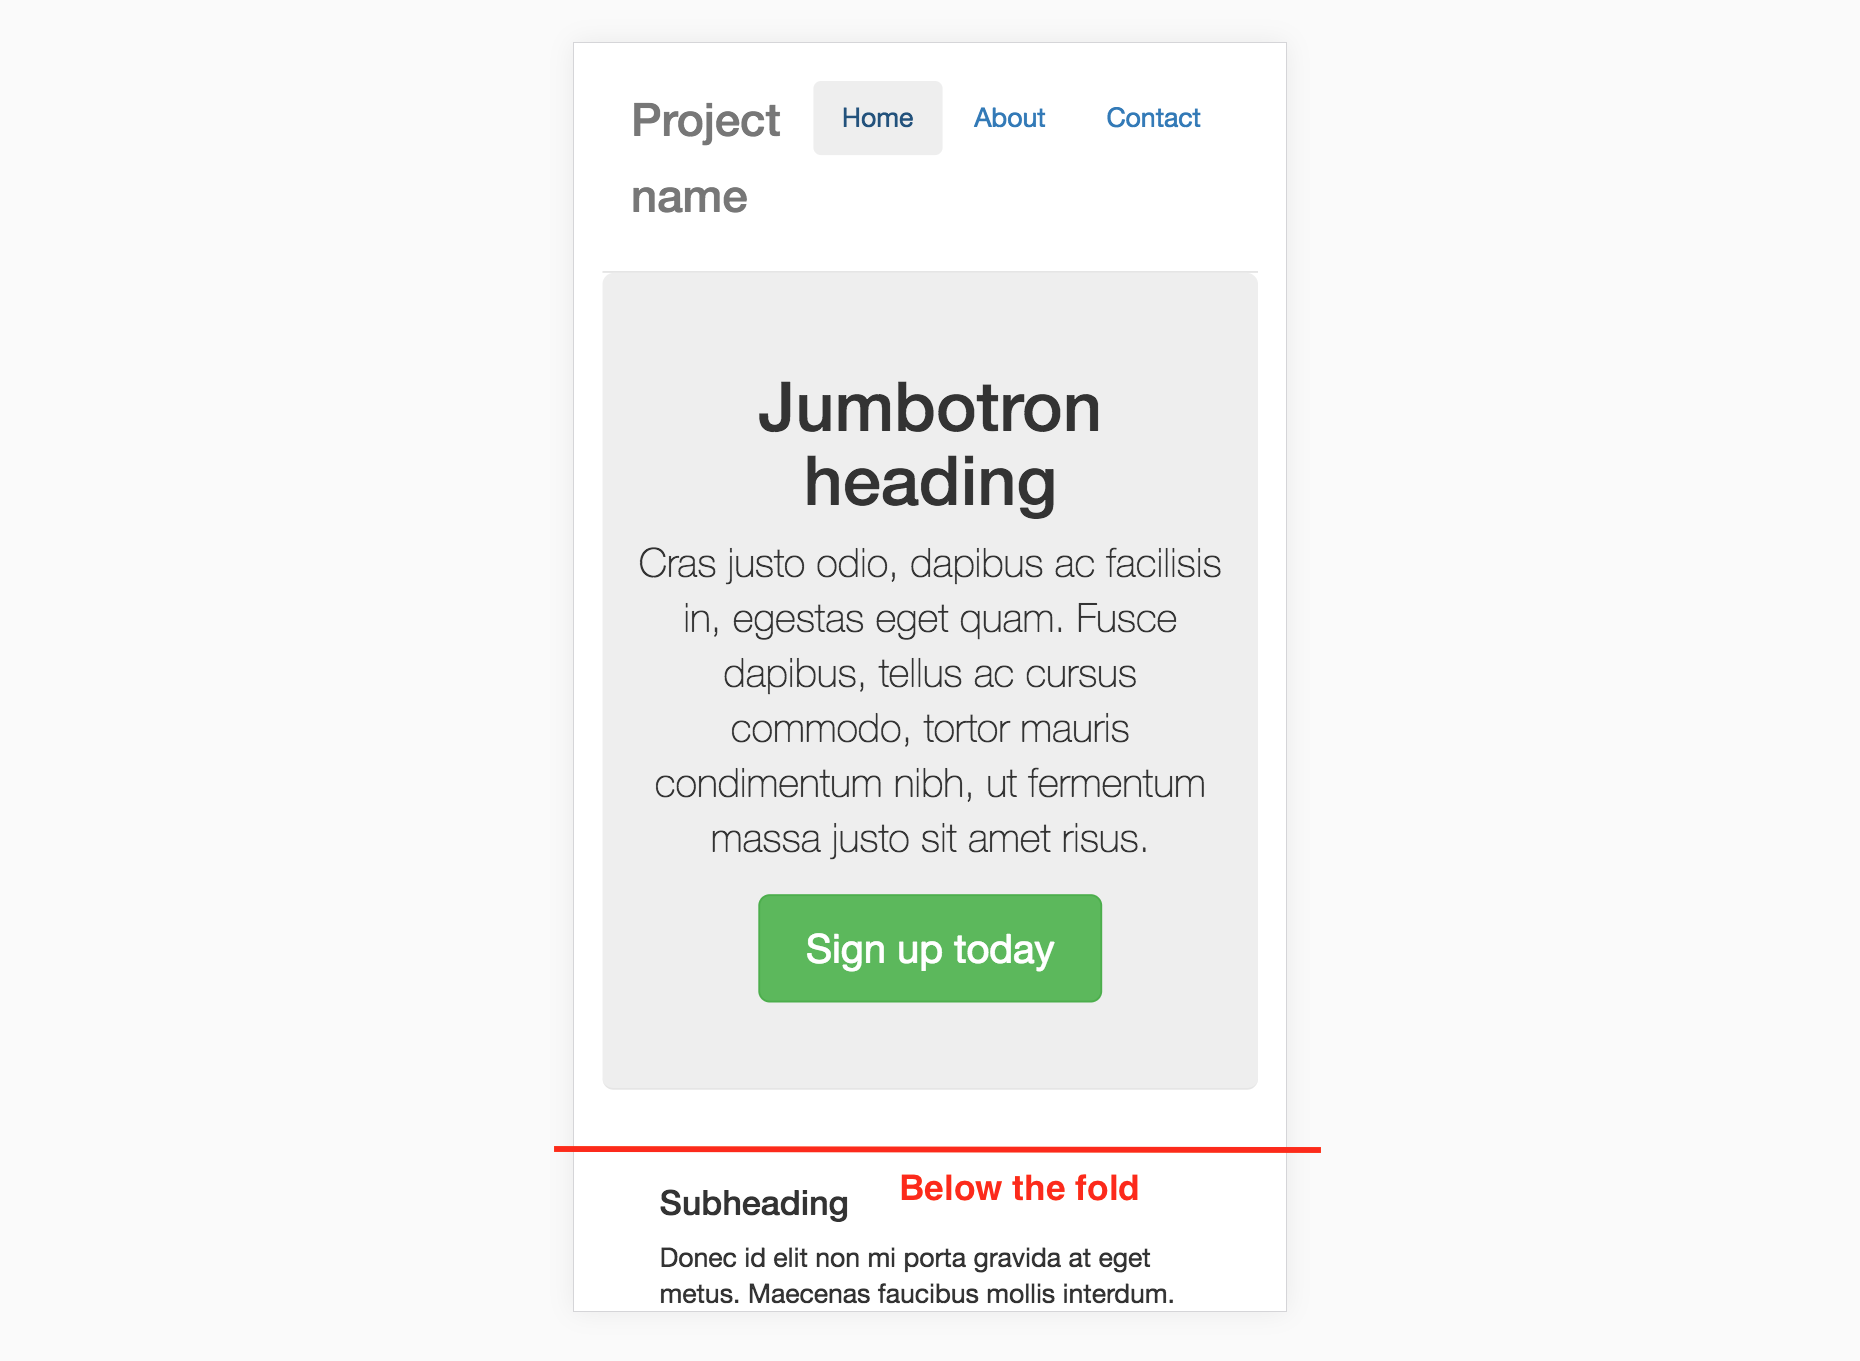
In this example app I consider the fold line to be just below the masthead. So let's include the nav bar and the masthead on the initial page load, but anything below that can be loaded afterwards. I'll now create a component called BelowFold and abstract the relevant markup into that:
Home.vue
<template>
  <div>
    <div class="jumbotron">
        <h1>Jumbotron heading</h1>
        ...
    </div>

    <below-fold></below-fold>

    <!--All the code below here has been put into-->
    <!--into the above component-->
    <!--<div class="row marketing">
      <div class="col-lg-6">
        <h4>Subheading</h4>
        <p>Donec id elit non mi porta gravida at eget metus. Maecenas faucibus mollis interdum.</p>
        ...
      </div>
      ...
    </div>-->

  </div>
</template>
<script>

  const BelowFold = () => import(
    /* webpackChunkName: "below-fold" */ './BelowFold.vue'
  );

  export default {
    ...
    components: {
        BelowFold
    }
  }
</script>
BelowFold.vue
<template>
  <div class="row marketing">
    <div class="col-lg-6">
      <h4>Subheading</h4>
      <p>Donec id elit non mi porta gravida at eget metus. Maecenas faucibus mollis interdum.</p>
      ...
    </div>
    ...
  </div>
</template>
We will now see the below-fold chunk in its own separate file when we bundle the code:
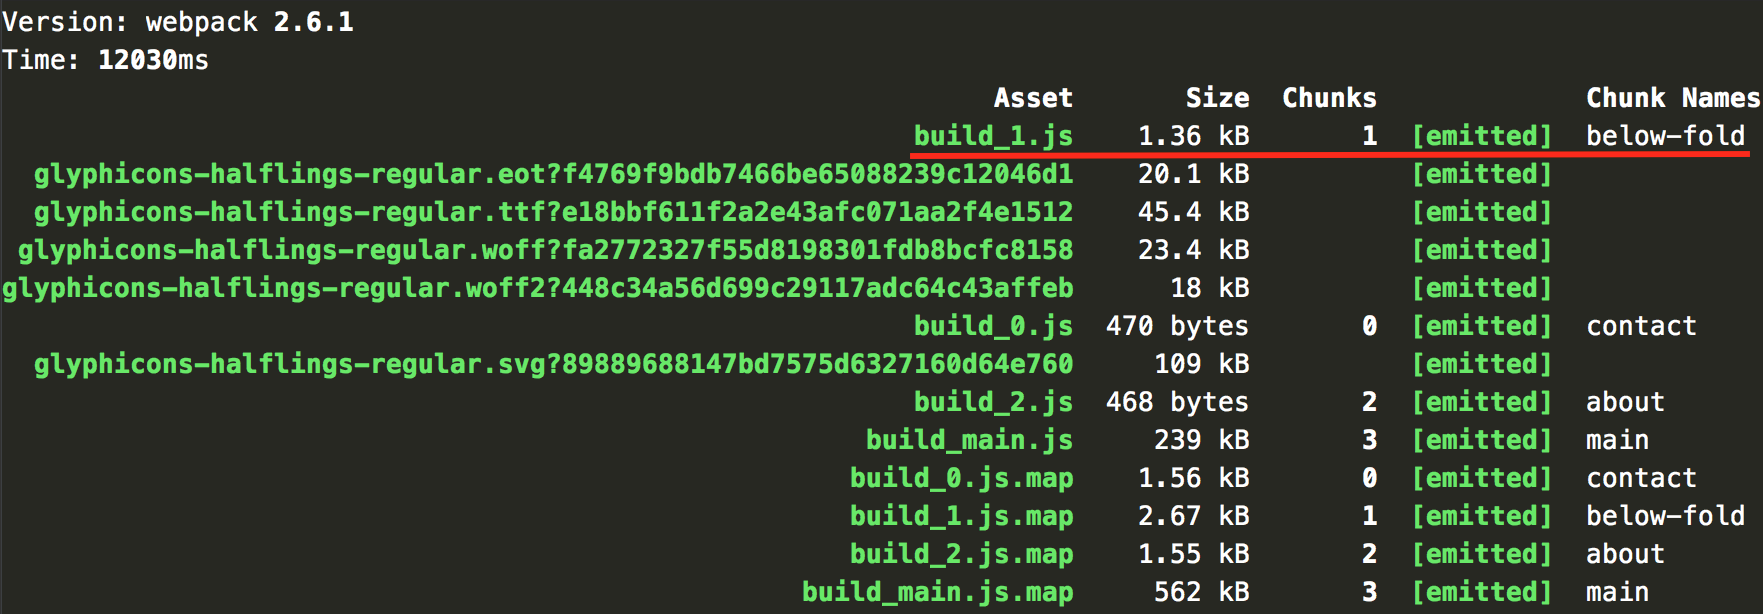
Note: the below-fold chunk is very small (1.36kB) and it seems hardly worth bothering to split this out. But that's only because this is a demo app with very little content. In a real app, the majority of the page is likely to be below the fold, so there might be a tonne of code there including CSS and JS files for any sub components.
3. Conditional Content
Another good candidate for code splitting is anything that is shown conditionally. For example a modal window, tabs, drop down menus etc.
This app has a modal window that opens when you press the "Sign up today" button:
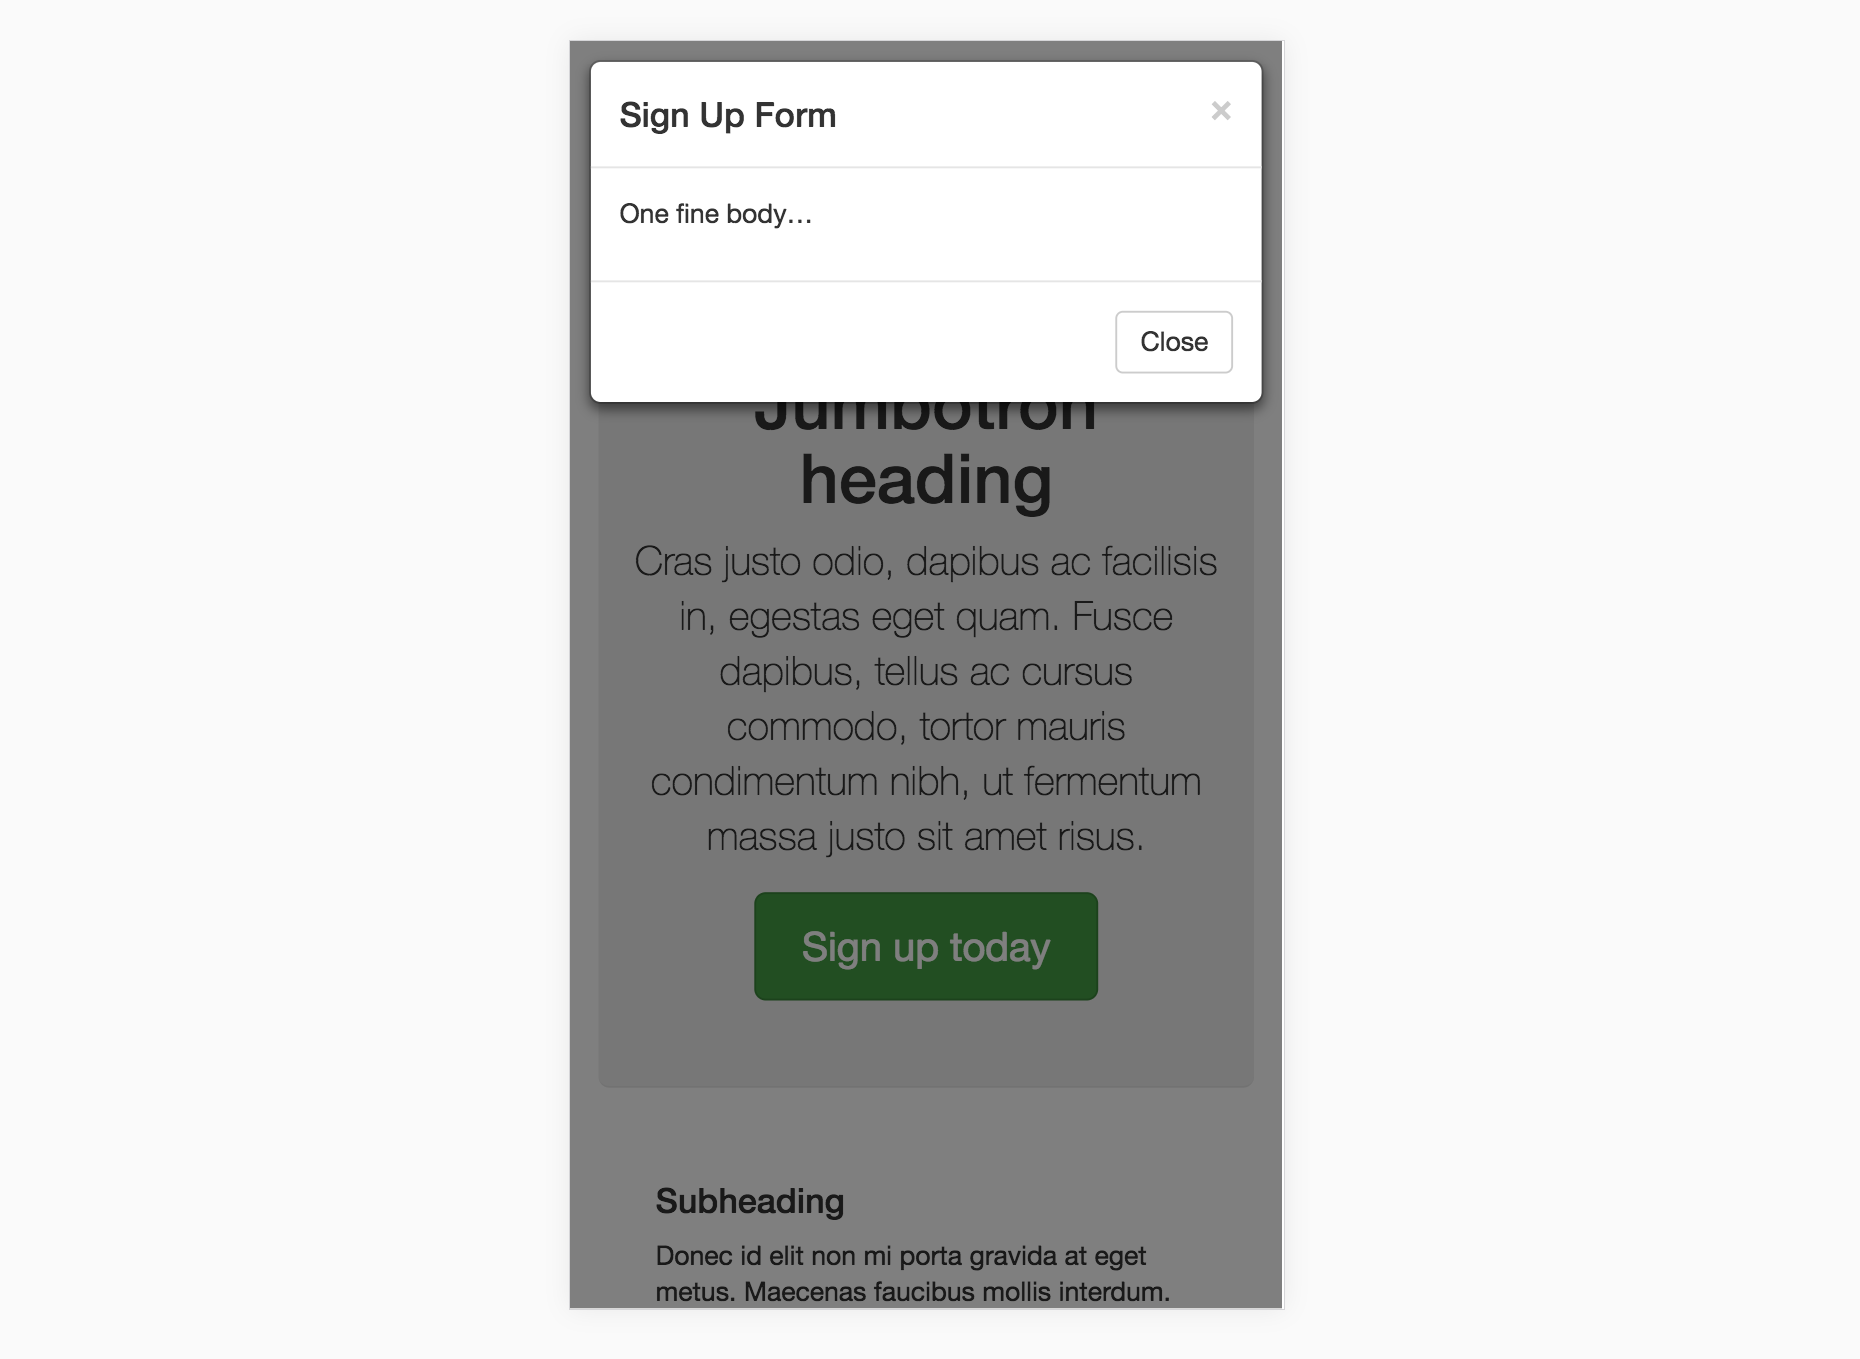
As before, we just move the modal code into its own single file component:
Home.vue
<template>
  <div>
    <div class="jumbotron">...</div>

    <below-fold></below-fold>

    <home-modal v-if="show" :show="show"></home-modal>
  </div>
</template>
<script>

  const BelowFold = () => import(
    /* webpackChunkName: "below-fold" */ './BelowFold.vue'
  );
  const HomeModal = () => import(
    /* webpackChunkName: "modal" */ './HomeModal.vue'
  );

  export default {
    data() {
      return {
        show: false
      }
    },
    components: {
      HomeModal,
      BelowFold
    }
  }
</script>
HomeModal.vue
<template>
    <modal v-model="show" effect="fade">...</modal>
</template>
<script>
  import Modal from 'vue-strap/src/Modal.vue';

  export default {
    props: ['show'],
    components: {
        Modal
    }
  }
</script>
Notice that I've put a v-if on the modal. The boolean show controls the opening/closing of the modal, but it will also conditionally render the modal component itself. Since on page load it's false, the code will only get downloaded when the modal is opened.
This is cool because if a user never opens the modal, they never have to download the code. The only downside is that it has a small UX cost: the user has to wait after they press the button for the file to download.
After we build again, here's what our output looks like now:
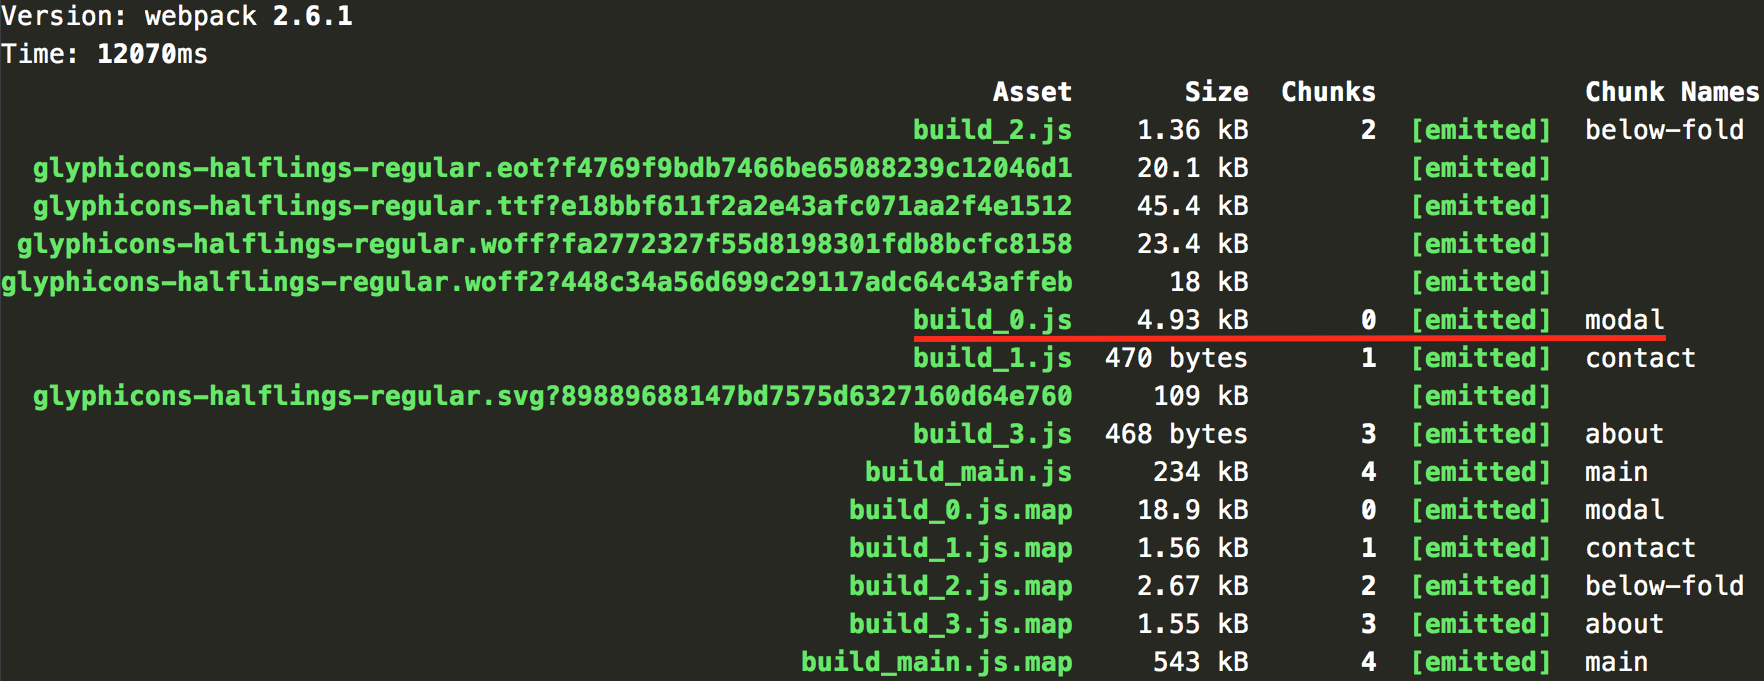
Another ~5KB we don't have to load up front.
Conclusion
Those are three ideas for architecting an app for code splitting. I'm sure there are other ways to do it if you use your imagination!
About Anthony Gore
If you enjoyed this article, show your support by buying me a coffee. You might also enjoy taking one of my online courses!

Click to load comments...